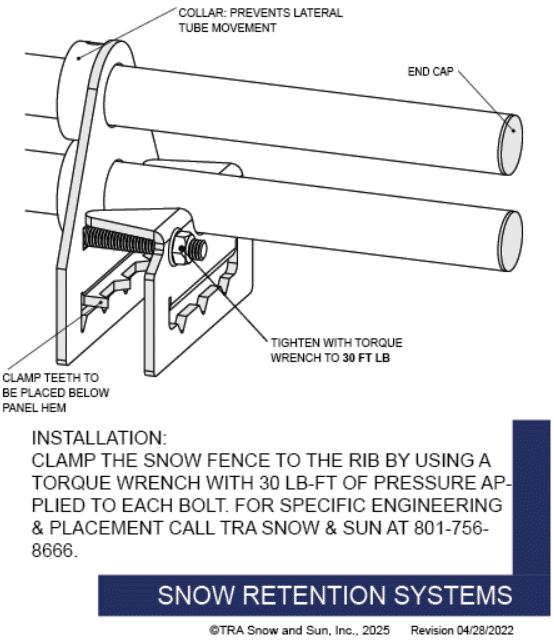
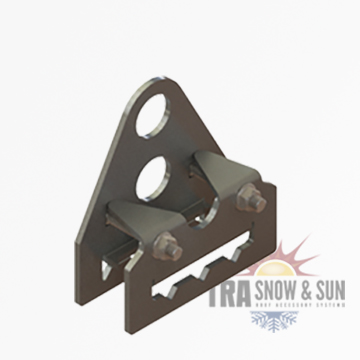
Description
No Set Screws
No Panel Penetration
Custom Made
Custom Designs and Engineering
The Clamp-on’s are custom made to fit the following seam profiles. Just give us your x, y and z dimensions and we will manufacturer it for your seam profile. If the seam profile you have is not listed please submit your dimensions and we will let you know what is available.No crimping or folding. You give us the seam dimensions and we will manufacture it to fit.
At TRA Snow and Sun we engineer and lay out each project free of charge using many factors specific to your roof. We then provide you with the snow retention plan, layout and product detail. TRA Snow and Sun representatives will work with you to design the most efficient snow retention system.
All Standing Seam Snow Fences have been tested from the fail point of the system.
Materials
• Steel: 3/16” (ASTM A1011 & A880)
• Copper: 1/4” (ASTM B152)
• Aluminum: 1/4” (ASTM B209)
• Cor-Ten®: 3/16” (ASTM A588)
• Stainless Steel: 8 gauge (ASTM A240)
Dimensions
Length: 5.19″
Width: 1.93″
Height: Varies based on seam profile
Finishes
• Raw steel
• Electro-galvanized steel
• Hot-dipped galvanized steel
• Mill finish aluminum
• Mill finish copper
• Mill finish Cor-Ten®
• Stainless steel
• Powder coating available in RAL Standard colors visit http://trasnowandsun.com//snow-retention-product-colors
to see color chart
Installation
The guidelines are meant to be general rules regarding snow retention and its’ applications. While these guidelines should be strictly adhered to, there may be times when it is impractical to do so or job conditions dictate that exceptions be made. In these cases, the contractor should contact the manufacturer for special instructions. At the very minimum we strongly recommend these guidelines be followed:
1. Drop a chalk line on roof at 12” from the eave or the proper spacing from last fence.
2. Count the number of clamps to be used on one length of fence pipe and slide clamps on to pipe.
3. If at start or end of a fence section (max 50’) place collar(s) on the inside of the first/last clamp.
4. Position clamps on chalk line ensuring the teeth of the clamp are on the open side of the seam. (The teeth should
fit snuggly under the finished hem)
5. Locate clamps on the seams and tighten the clamps just enough to prevent movement.
6. Ensure the clamps are true to the chalk line (adjust if necessary) and using a calibrated torque wrench torque all bolts to 30 ft-lbs.
7. Slide the collar to fit against the first or last clamp and torque set screw to approximately 15 ft-lbs.
8. If snow fence run is longer than 50’, an expansion joint is required of 3-6 inches.
9. Upon terminating if necessary, cut off access pipe and seal cut end with weatherproof sealant to prevent
corrosion.
10. Install End caps into pipe ends, caps should compression fit inside ends, tap with a hammer and remove any metal
burrs or excess paint with metal file if necessary.
Testing
All Standing Seam Snow Fences have been tested from the fail point of the system.